


.png)


Weililai Hardware Products Co., Ltd
Office Chair Chassis
Installation and Use Guide
Before you begin installation, be sure to read the entire instruction manual carefully!


Part I: Chassis Installation Steps
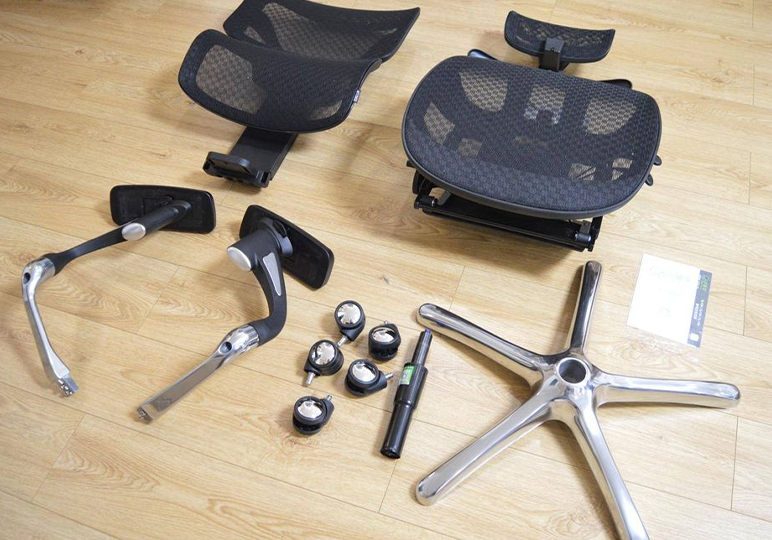
Step 1: Prepare the Parts
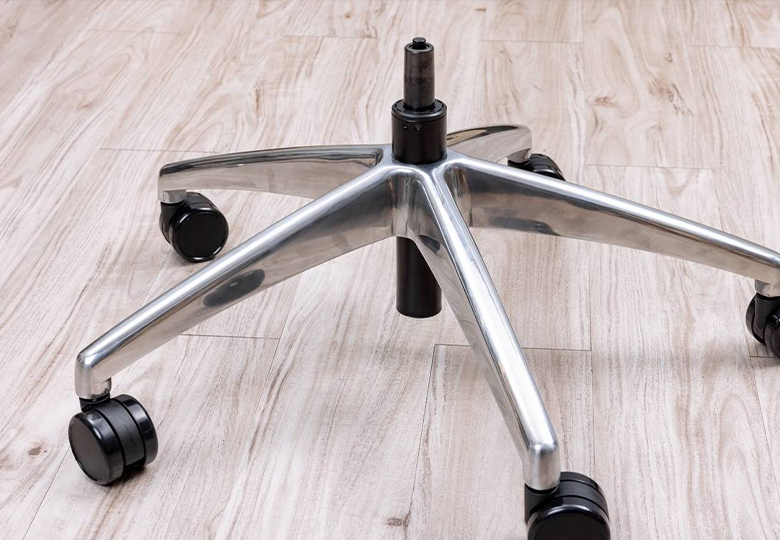
Step 2: Install wheels to five-star foot
Count all parts: five-star feet, gas bar, chassis, chair seat (usually already attached or attached later), armrests (if applicable), screws, etc.
Press the five casters (wheels) vertically downward into the five sockets of the five-star foot until you hear a "click" sound or feel it is fully locked.

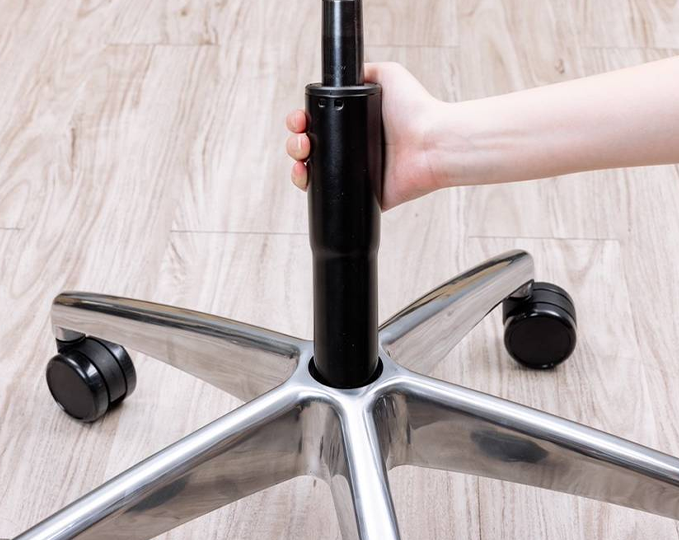
Step 3: Install gas pressure rod to five-star foot
• Find the mounting hole in the center of the five-star foot.
• Insert the thicker end of the gas pressure rod (usually the end with the black plastic sleeve or the MAX mark facing up) vertically into the center hole of the five-star foot.
• Use the palm of your hand or a rubber hammer to gently and vertically tap the top of the gas pressure rod until it is fully and firmly inserted into the five-star foot. Do not hit it with a metal hammer!
Key points:
• Direction: Make sure that the gas pressure rod is inserted in the correct direction (thick end/MAX end facing downward).
• Vertical: Keep it absolutely vertical when applying pressure.
• Firm: Make sure the gas pressure rod is installed firmly without shaking.
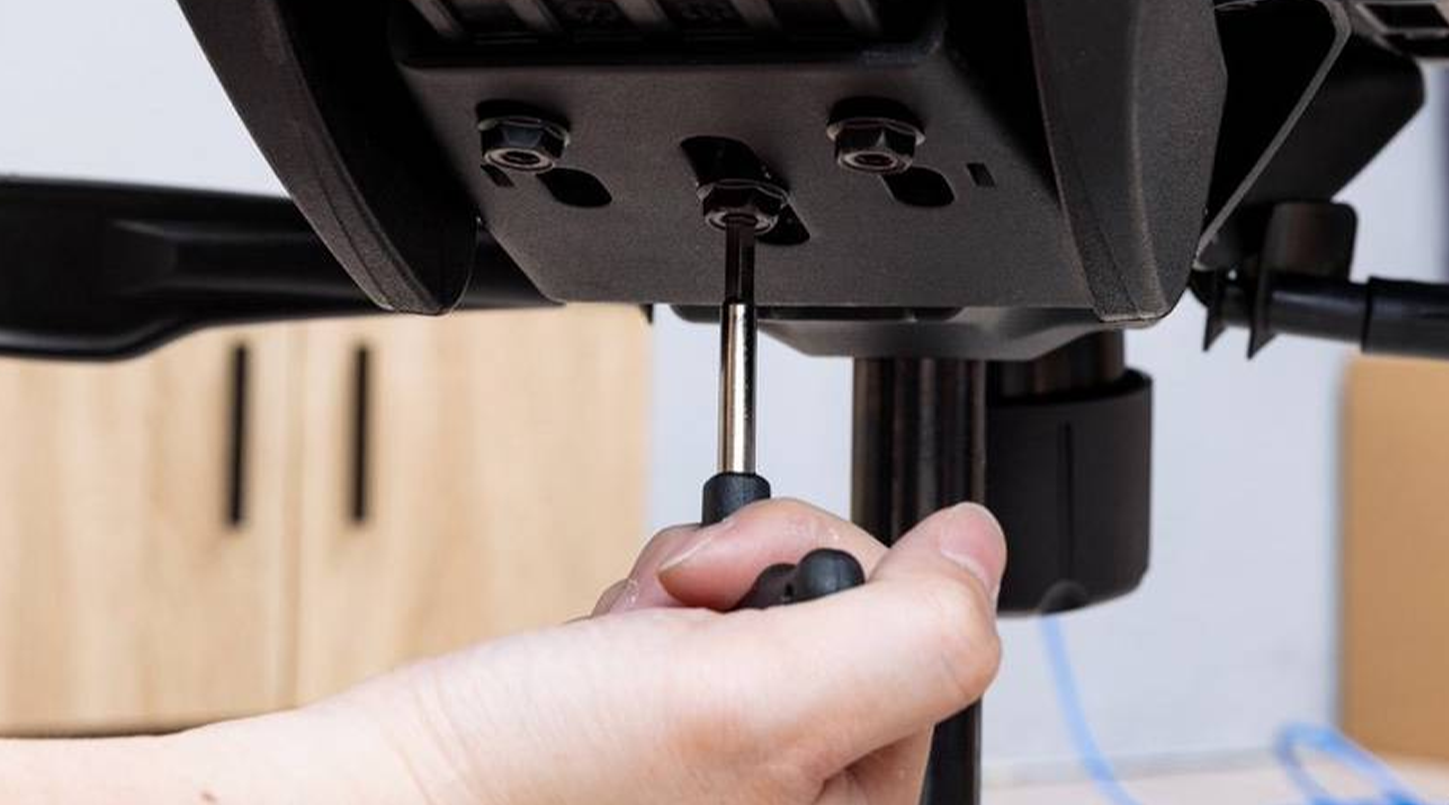
• Note: Many office chairs have the chassis screwed to the bottom of the seat at the factory. If it is already fixed, please skip this step.
• If not connected: Align the chassis (control mechanism part) with the mounting holes at the bottom of the seat.
• Use the included screws (usually 4) and tools (usually an Allen wrench) to firmly tighten the chassis to the bottom of the seat. Tighten the screws step by step in diagonal order to ensure uniform force.
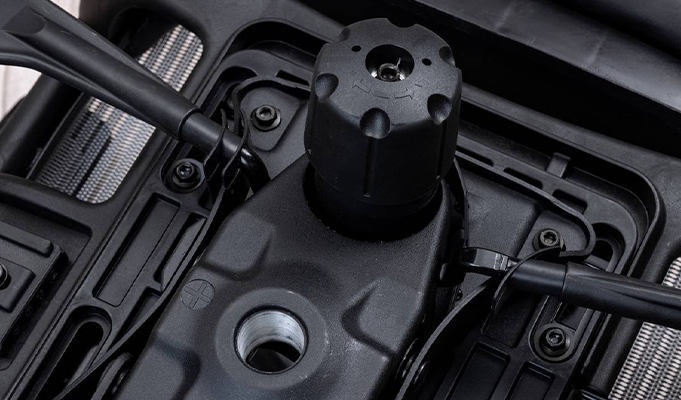
Step 4: Connect the chassis to the
seat (if not connected at the factory)
• Hold the seat assembly steady with both hands (with the chassis facing down).
• Find the large round hole in the center bottom of the chassis (where the gas rod is inserted).
• Align the center hole of the chassis vertically with the top of the gas rod (usually the silver metal rod or the end with the piston).
• Keep the seat completely horizontal and do not press on the seat, and apply steady, firm pressure vertically downward.
• You may need to apply considerable force (or use your body weight to carefully press down) until you hear a distinct "click" or feel the chassis completely seated on top of the gas rod and the seat cannot move down any further.
Step 5: Install the seat assembly (with chassis) onto the gas rod
.png)
Key points:
• Vertical! Vertical! Vertical! Any angle deviation may cause installation failure or damage.
• Do not rotate! Never rotate the seat or base during installation.
• Confirm in place: Make sure the base is fully seated, with no looseness or play. Try to gently lift the seat up and down, it should be very stable.
• If the armrests need to be installed separately to the seat, find the corresponding mounting holes according to the instructions (usually under or on the sides of the seat).
• Use the screws and tools provided to tighten the armrests securely.
Step 6: Install The Armrests
(If Applicable And Not Pre-installed)
• Check that all screws are tight.
• Check that the chassis is firmly attached to the gas cylinder (try to slightly lift up and down and turn the seat left and right. It should be very stable, with only the height adjustment allowed by the gas cylinder itself).
• Check that the wheels rotate smoothly.
• Check that the armrests (if installed) are stable.
Step 7: Final Check
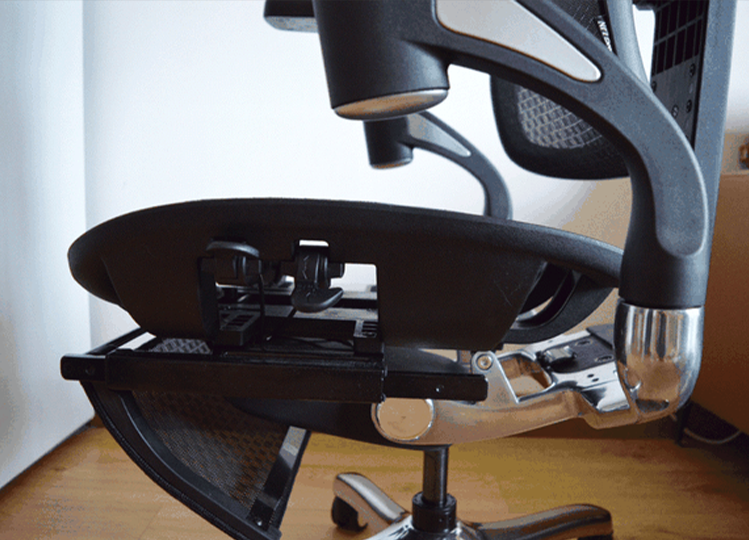
Part 2: Chassis
Function Usage Guide
The chassis is the core control center of the office chair, and usually includes the following functions (specific functions vary by model):
• Seat height adjustment lever
• Reclining lock lever
• Reclining tension knob
• Seat depth adjustment handle (if any)
Function 1: Seat height adjustment
• Operation: Find the height adjustment lever (usually a large lever) directly below the seat.
• Raise: Leave the seat surface, pull up the adjustment lever, and the seat will automatically rise. Release the adjustment lever lock when the ideal height is reached.
• Lower: Sit on the seat surface (or apply weight to the seat surface), pull up the adjustment lever, and the seat will lower under the action of weight. Release the adjustment lever lock when the ideal height is reached.
Ergonomic advice:
Adjust the height so that your feet are flat on the ground, your thighs are parallel to the ground or slightly tilted downward, and your knees are bent about 90 degrees. Your elbows should match the height of the table.
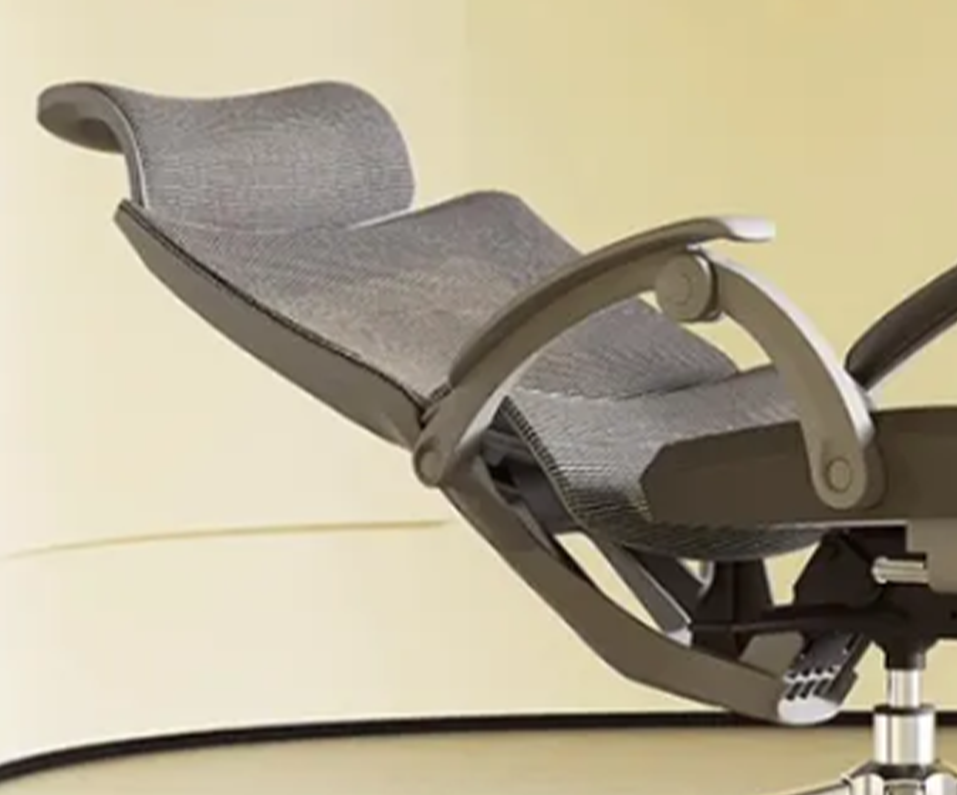
• Unlocking the reclining back: Usually, you don’t need to operate the lever, just lean back and the chair back will follow the reclining (make sure the reclining lock is unlocked).
• Locking the reclining back: Find the reclining lock lever (usually located below or on the side of the height adjustment lever). Pushing this lever up or down can lock the chair back at the current angle or a specific gear (the locking mechanism varies from model to model).
Function 2: Reclining function (locking
and unlocking the reclining back)

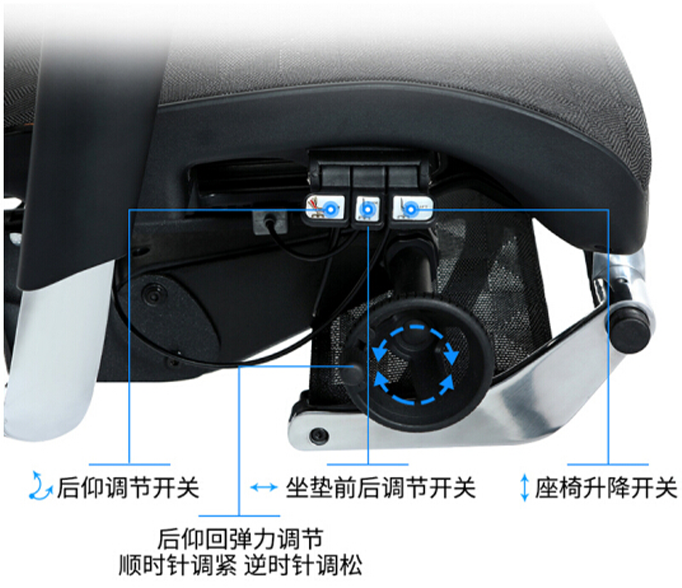
Function 3: Reclining tension adjustment
• Operation: Find the reclining tension adjustment knob (usually a large round knob located below or on the side of the chassis).
• Adjustment: Sit in the chair and turn the knob:
• Clockwise: Increases recline resistance (requires more force to recline, suitable for heavier people or those who need more stable support).
• Counterclockwise: Reduces recline resistance (easier to recline, feels more flexible).
• Adjust to a comfortable and supportive tension based on your weight and preferences.
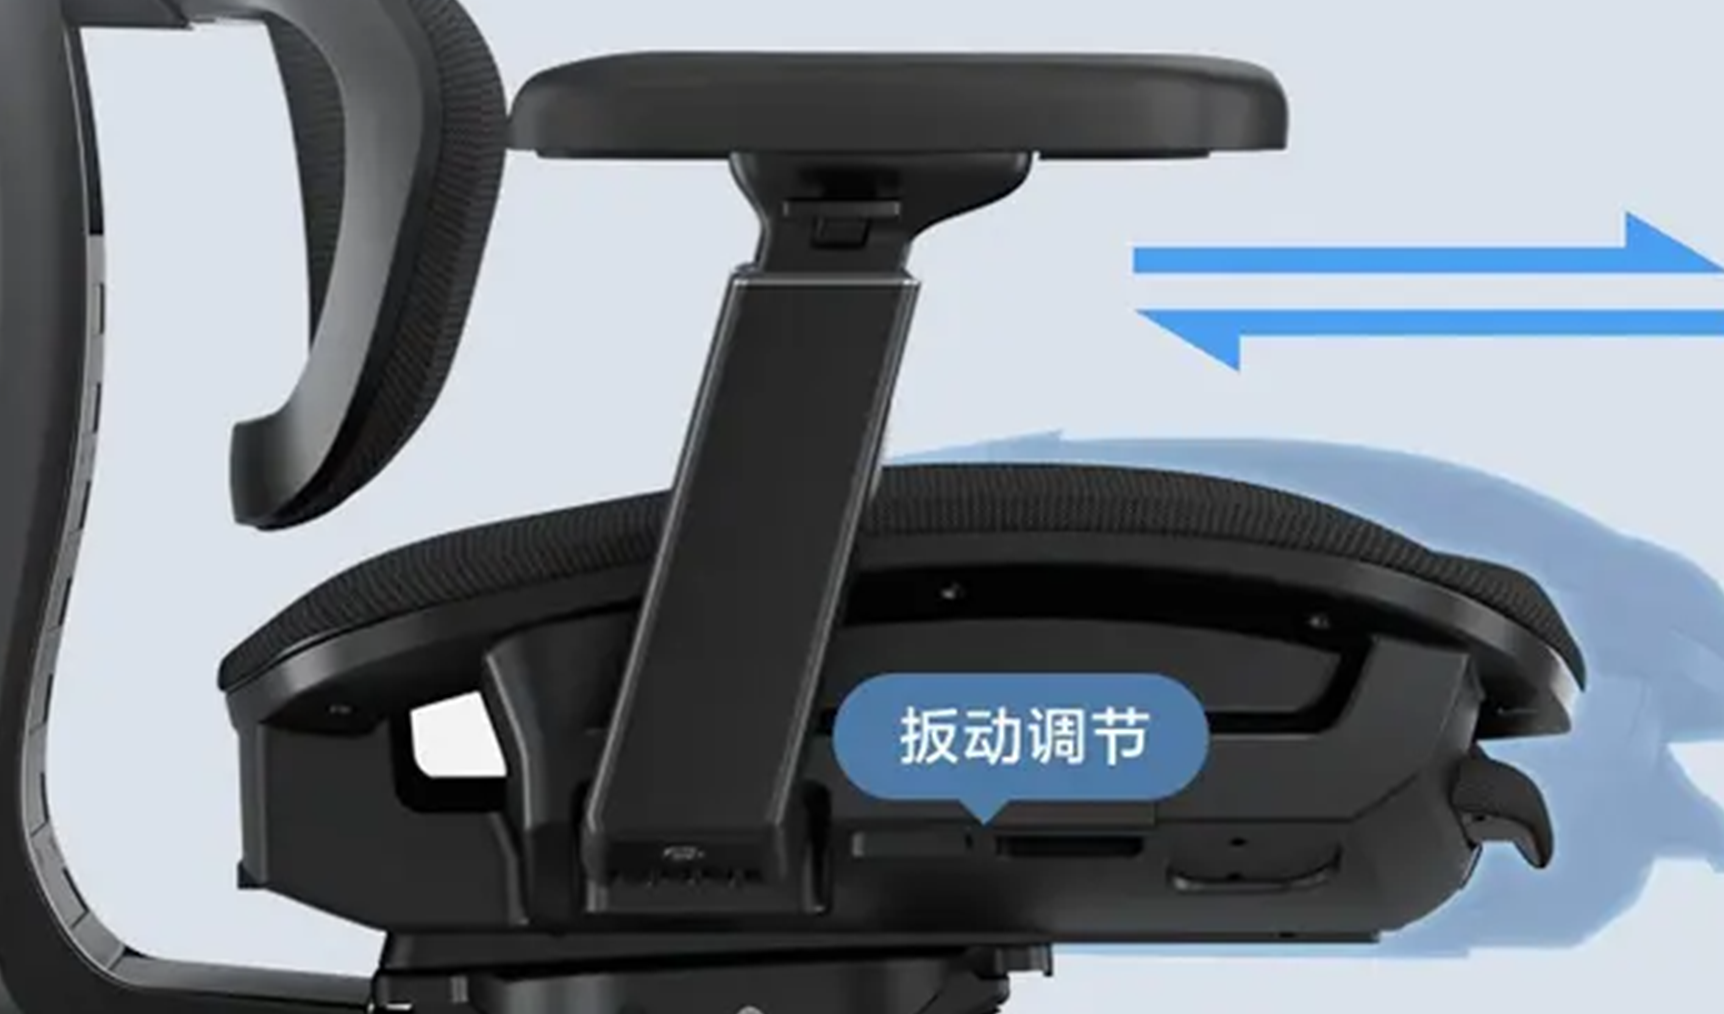
Function 4: Seat depth adjustment
(sliding seat function - if equipped)
• Operation: Find the seat depth adjustment handle (usually a small pull ring or lever) under the front edge of the seat.
• Adjustment: Stand off the seat and pull up on the handle/lever, which can now slide the seat cushion forward and backward. Adjust so that your back is completely against the seat back when you sit down, and the distance behind your knees is about 2-4 finger widths from the front edge of the seat cushion. Release the handle to lock.
Part III: Safe Use and Maintenance
Correct Seating
Avoid jumping into the seat or leaning back hard, which will cause impact on the gas pressure rod and structure.
Regular inspection
Check all screws to see if they are tight and check if the gas pressure rod is abnormal (obvious scratches, bends, signs of oil leakage) every month. If so, stop using it immediately and contact a professional for replacement. Check if the five-star feet have cracks and if the wheels rotate smoothly and without damage.
Cleaning
Wipe the chassis surface and five-star feet with a clean soft cloth dipped in neutral detergent and water. Avoid using corrosive solvents or large amounts of water to rinse directly, especially to prevent liquids from entering the gas pressure rod connection or the control mechanism.
Prohibited Behavior
Never attempt to disassemble, repair or modify the gas pressure rod. Do not exceed the maximum load limit. Do not use the chair as a ladder or step. Avoid placing obstacles around the chair and ensure that the wheels have clear space to move.
Replacement of parts
If you need to replace parts such as wheels and gas cylinders, be sure to purchase original or qualified products with exact specifications, and install them in the correct way or have them done by professionals.
Troubleshooting tips:
• Chair sinking: Usually the gas cylinder fails. Stop using it immediately and replace the gas cylinder.
• Height adjustment failure: Check whether the height adjustment rod is connected normally; try to leave the seat surface pull rod to see if it can be raised. If not, the gas cylinder or adjustment mechanism may be faulty.
• Reclining function failure or abnormal noise: Check whether the reclining locking rod is stuck; check whether the reclining mechanism screws are loose; adjust the tension knob to see if there is any improvement. If the abnormal noise continues or the reclining cannot be done, professional repair may be required.
• Wheel jamming: Clean the hair and thread ends entangled on the wheel; check whether the wheel is damaged; try to replace a new wheel.
• Loose screws: Check and tighten regularly.
Always put safety first! Proper installation, proper use and regular maintenance of your office chair chassis are the key to ensuring its long-term, safe and comfortable operation.
Moving the Chair
It is best to lift the chair when moving it, or lift the front wheel by holding the bottom of the seat and then push it, and avoid dragging it directly on the carpet or uneven ground, which will damage the wheels and floor.
© 2025 Weililai Hardware Products Co., Ltd. — Design by Erge

_cVJsSf.png)
No. 3, No. 6 Yonghong Road, Yongli Industrial Park, Jinli Town, Gaoyao District, Zhaoqing City, Guangdong, China
_GCnBd3.png)

SEND INQUIRY